There’s something undeniably enchanting about fresh pasta – its tender texture, delicate flavor, and the artistry woven into every handmade strand or shape. Among these culinary treasures, orecchiette stands out, its name meaning “little ears” in Italian, perfectly capturing its charming, ear-shaped form. This humble yet versatile pasta hails from the sun-kissed regions of southern Italy, where generations have passed down the secrets of crafting it by hand. In this step-by-step guide, we invite you to roll up your sleeves and embark on a journey to make fresh orecchiette from scratch. Whether you’re a seasoned pasta lover or a curious kitchen adventurer, discover how simple ingredients and patient hands transform into small edible works of art that carry the warmth of Italian tradition right to your table.
Crafting Fresh Orecchiette begins with a dedication to quality ingredients, time-honored technique, and a passion for authentic Italian flavors. This humble pasta, hailing from the Puglia region, brings a rustic charm and delightful texture that pairs beautifully with vibrant, seasonal sauces. I still recall my first attempt making orecchiette by hand-feeling the dough softly yield beneath my fingers and watching those tiny “little ears” come to life reminded me why fresh pasta transcends store-bought varieties. Whether you’re new to pasta-making or refining your skills,this guide will empower you to create pasta with unmatched tenderness and taste.
Prep and cook Time
- Preparation: 30 minutes
- Resting the Dough: 30 minutes
- Hand-Shaping: 45 minutes
- Cooking: 3-5 minutes
- total Time: Approximately 1 hour 50 minutes
Yield
Makes approximately 4 servings (about 400 grams of fresh orecchiette)
Difficulty Level
Medium: Requires hand-shaping technique and attention, but accessible for dedicated home cooks
Ingredients for Authentic Orecchiette Dough
- 2 cups all-purpose flour, sifted (preferably Italian ”00″ for a silky texture)
- 3/4 cup fine semolina flour
- 3/4 cup lukewarm water
- 1/2 teaspoon fine sea salt
- 1 tablespoon extra virgin olive oil (optional, for added elasticity)
Instructions: Mastering the Art of Hand-Shaping Orecchiette
- Combine the flours and salt in a large mixing bowl or on a clean work surface, creating a mound.
- Make a well in the center; gradually pour in the lukewarm water and olive oil.
- Slowly incorporate the flour into the liquid with a fork or fingertips, drawing from the edges toward the center until a rough dough forms.
- Knead vigorously for 10 minutes until the dough becomes smooth, elastic, and slightly tacky but not sticky. Add minimal extra flour if too wet.
- Wrap the dough in plastic wrap and let it rest at room temperature for 30 minutes. This relaxes the gluten for easier shaping.
- Divide the dough into 4 equal logs about 1.5 cm in diameter.
- Cut each log into small pieces (about 1 cm each). Using your thumb or a small knife, press and drag each piece along a smooth surface to create the signature concave “little ear” shape.
- Place the shaped orecchiette on a lightly floured tray, covering with a clean cloth to prevent drying.
- Boil salted water in a large pot. add fresh orecchiette gently and cook for 3-5 minutes,or until al dente and tender with a slight bite.
- Drain carefully, reserving pasta water to loosen sauces if needed.
Techniques for Cooking and Serving Fresh Orecchiette with Flavorful Sauces
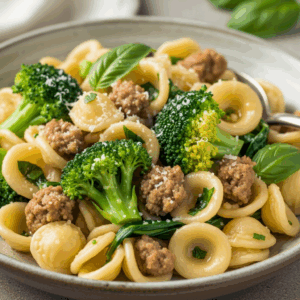
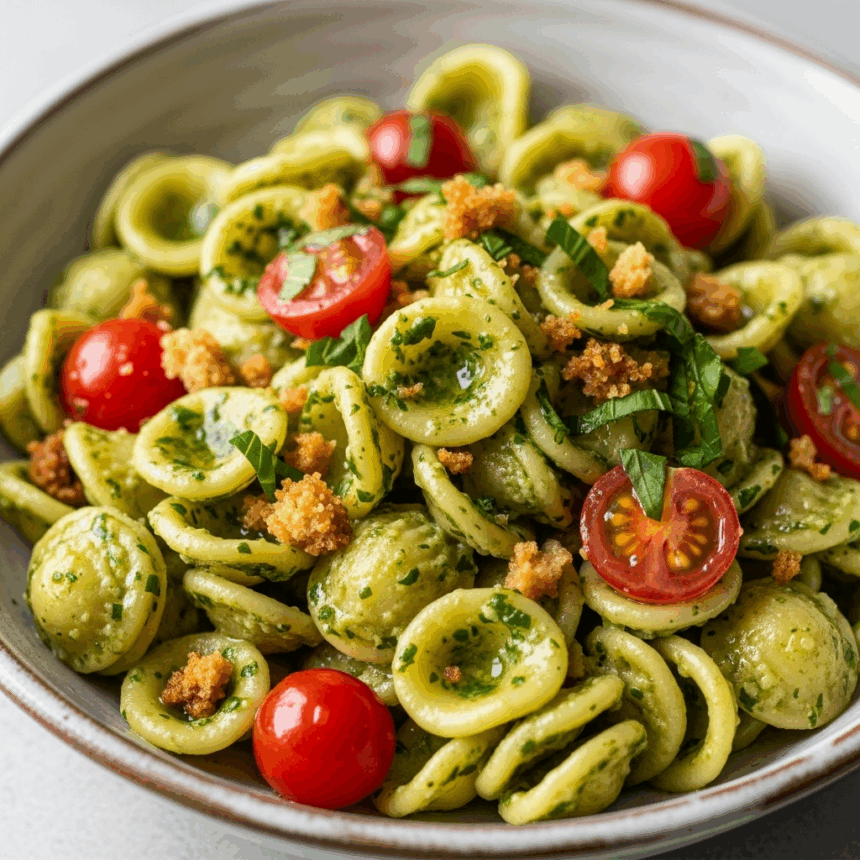
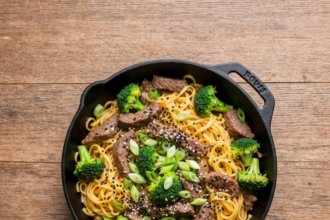
For best results, pair your freshly crafted pasta with vibrant, slow-simmered sauces. Orecchiette’s cup-like form holds chunky sauces beautifully-try a crisp broccoli rabe sautéed with garlic and chili flakes, or a hearty pork ragù that clings to every curve. When tossing, add reserved pasta water in small amounts to marry the sauce and pasta perfectly, adding silkiness without dilution.
To elevate presentation, garnish with freshly grated Pecorino Romano, a drizzle of chili-infused olive oil, or toasted pine nuts for crunch. Serve promptly with a sprig of fresh basil or parsley for color and aroma.
Storing and Reusing Fresh Orecchiette Dough for Future Culinary Adventures
If you wish to pause your pasta adventure, wrap the dough tightly in plastic wrap after kneading and resting, than refrigerate for up to 24 hours. Before shaping, let it approach room temperature for easier handling. For longer storage, freeze the shaped but uncooked orecchiette on a baking sheet lined with parchment, then transfer to a freezer-safe bag. They freeze well and can be cooked directly from frozen-just add an extra minute to the cooking time.
chef’s Notes: Tips for Success
- Flour choice is key: For a lighter, silkier results, mix Italian ”00″ flour with semolina to enhance texture and bite.
- Water temperature: Use lukewarm water to activate gluten without overheating which can make dough sticky or tough.
- Perfecting shape: Keep your fingers slightly dusted with semolina to prevent sticking during shaping.
- Don’t rush resting: The resting phase softens the dough, making it pliable and easier to shape.
- Practice makes perfect: Orecchiette shapes vary naturally-embrace irregularities for a rustic, handcrafted feel.
- Make ahead: dough can be prepared a day in advance for convenience without sacrificing quality.
Serving Suggestions
Enjoy your fresh orecchiette with customary sauces like orecchiette alle cime di rapa (with broccoli rabe), a slow-cooked tomato and sausage ragù, or a simple garlic-and-olive-oil dressing tossed with sautéed cherry tomatoes and fresh herbs. Garnish with crusty bread and a well-aged Pecorino for an unforgettable meal.


| nutrient | Amount per Serving |
|---|---|
| Calories | 320 kcal |
| Protein | 10 g |
| Carbohydrates | 68 g |
| Fat | 1.5 g |

For further inspiration on shaping traditional pasta, explore our article on Homemade Pasta Techniques. To deepen your knowledge on Italian flour types and their impact on pasta making, visit Barilla’s expert guide.
Q&A
Q&A: Crafting Fresh Orecchiette – A Step-by-Step culinary Guide
Q1: What exactly is orecchiette, and what makes it unique among pasta shapes?
A1: Orecchiette, derived from the Italian word for “little ears,” is a charming, ear-shaped pasta native to the Puglia region in Southern Italy. Its concave form is not just visually appealing but functional – it cradles sauces beautifully,offering pockets of flavor with every bite. This unique shape sets it apart from flat or tubular pastas, making it a favorite for hearty, rustic sauces.
Q2: Why shoudl I try making fresh orecchiette at home instead of buying dried pasta?
A2: Freshly crafted orecchiette offers a tender texture and subtle chew that dried pasta can’t match. The handmade process allows you to connect with Italian culinary tradition, infusing your dish with authenticity and a personal touch. Plus, making fresh pasta can be both therapeutic and rewarding, turning cooking into an artful experience rather than just a chore.
Q3: What are the fundamental ingredients needed to make traditional orecchiette dough?
A3: The classic orecchiette dough is beautifully simple: just semolina flour and water. Some recipes might add a pinch of salt or a drizzle of olive oil, but the essence lies in the semolina’s coarse texture which gives the pasta its characteristic bite and golden hue. Notably, no eggs are typically used in this dough, lending it a slightly firmer texture well-suited for its rustic shape.
Q4: Can you outline the key steps to shape orecchiette by hand?
A4: Absolutely! Start by rolling your dough into long, thin ropes about the thickness of a pencil. Then, slice these ropes into small pieces roughly the size of a chickpea. Using the edge of a knife or your thumb, press and drag each piece across a wooden board, creating a small cup with a rough exterior and smooth interior. This delicate flicking motion is what gives orecchiette their signature ear-like curve and texture.
Q5: Are there any tips or tricks to ensure the dough doesn’t stick during shaping?
A5: Keeping your workspace lightly dusted with semolina flour is key – it prevents sticking without drying out your dough. Additionally, working with slightly firm dough (not too wet) helps maintain shape. If your dough feels too sticky, allow it to rest wrapped in plastic for 15 minutes to absorb moisture evenly. shaping swiftly but gently preserves the dough’s elasticity.Q6: How should fresh orecchiette be cooked, and what kind of sauces complement it best?
A6: Fresh orecchiette cooks quickly-just 2 to 4 minutes in plenty of boiling salted water until al dente. Drain and immediately toss with your sauce to let those little “ears” soak up flavors. Traditional pairings include broccoli rabe with garlic and chili flakes,rich tomato ragùs,or simple sautéed vegetables with anchovies and olive oil.Its texture handles robust sauces wonderfully, making each bite a symphony of tastes.
Q7: Is it possible to store fresh orecchiette, and if so, how?
A7: Indeed! Fresh orecchiette can be dried by spreading them on a floured tray for several hours until firm, then stored in an airtight container for weeks. Alternatively, freeze the shaped pasta by placing them on a baking sheet lined with parchment paper until solid, then transfer to a freezer bag. When ready to cook, add frozen orecchiette directly to boiling water, adding a minute or two to the cooking time.
Q8: how can making orecchiette enrich my overall culinary skills?
A8: Crafting orecchiette hones your hands-on dexterity, sharpens your attention to detail, and deepens your appreciation for regional Italian cooking. It teaches patience and the joy of creating something from scratch, adding a new skillset for tackling other handmade pastas. More than that, it connects you to centuries of tradition, making every meal a cultural party.
Embrace the tactile beauty of dough and the quiet rhythm of shaping tiny ”little ears” – crafting fresh orecchiette is not just cooking, it’s a journey into the heart of Italian heritage. Buon appetito!
to Wrap It Up
Crafting fresh orecchiette is more than just a cooking technique-it’s a tactile journey that connects you to centuries of Italian tradition, one small ear-shaped pasta at a time. With patience and practice, your kitchen transforms into a haven of artisanal craftsmanship, where simple ingredients become tender, bite-sized morsels of comfort and authenticity. Whether you’re serving them with a hearty ragù or a simple drizzle of olive oil and herbs, homemade orecchiette bring a distinct texture and soul to every meal.So roll up your sleeves, embrace the dough’s whisper, and let this step-by-step guide inspire you to create pasta that’s not only fresh and flavorful but also steeped in the art of Italian culinary heritage. Buon appetito!