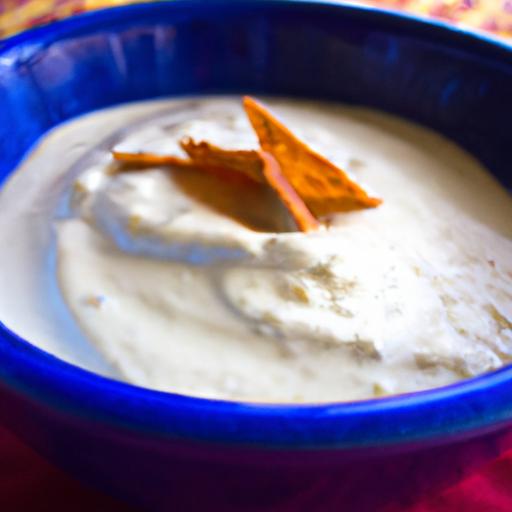
There’s something truly magical about queso fresco-the fresh, crumbly cheese that effortlessly elevates everything from tacos to salads with its mild, creamy charm.While it may seem like an elusive delicacy reserved for specialty stores or authentic Mexican kitchens, the truth is that crafting your own queso fresco at home is both surprisingly simple and deeply rewarding. In this guide, we’ll unwrap the secrets behind creating this luscious cheese from scratch, transforming everyday ingredients into a homemade treasure that adds a fresh burst of flavor and texture to your favorite dishes. Ready to embark on a delicious culinary adventure? Let’s dive into the art of crafting creamy queso fresco, right in your own kitchen.
Crafting Creamy Queso Fresco: Your Homemade Guide
Crafting creamy queso fresco at home is an inspiring culinary adventure that connects you to centuries of Mexican tradition. This fresh, tangy cheese embodies simplicity with a richness that elevates both humble dishes and vibrant feasts. When I first made queso fresco myself, the fresh smell of milk turning into cheese evoked memories of bustling mercados and sun-warmed kitchens. It’s a rewarding process that anyone can master with just a little guidance and careful attention to detail.
Prep and Cook Time
- Preparation Time: 10 minutes
- Cooking Time: 25 minutes
- Resting & Draining Time: 4-6 hours
Yield
approximately 1 pound (450g) of queso fresco,enough to serve 6-8 people
Difficulty Level
Medium – Requires attention to detail but perfect for beginners with patience
Selecting the Perfect milk for Smooth and Tangy Queso Fresco
Choosing the right milk is essential to crafting creamy queso fresco that boasts a luxuriously smooth texture with a pleasantly mild tang. Raw milk, if accessible and safe, provides the richest flavor and best curdling reaction, but high-quality whole milk from grass-fed cows also works beautifully. avoid ultra-pasteurized milk as it lacks the proteins needed to curdle properly and will lead to a grainy cheese. For an authentically fresh finish, opt for fresh, whole milk over low-fat or skim versions-this preserves the creaminess naturally.
Ingredients
- 1 gallon fresh whole milk (not ultra-pasteurized)
- 1/4 cup white distilled vinegar or freshly squeezed lemon juice
- 1 teaspoon kosher salt (adjust to taste)
- Optional: 1/4 teaspoon liquid calcium chloride (if using pasteurized milk for better curd formation)
- Optional: fresh herbs or spices for flavor infusion
Mastering the Cheese-Making Process Step by Step
- Heat the Milk: Pour the fresh whole milk into a large stainless steel pot and slowly warm it over medium heat to 85°F (30°C), stirring gently to prevent scorching.
- Add Coagulant: Remove from heat and stir in the vinegar or lemon juice slowly. For pasteurized milk, add calcium chloride first diluted in a small amount of water. Allow the milk to rest undisturbed for 20 minutes as curds form and separate from the whey. The milk should look visibly curdled with clear whey.
- Cut and Stir the Curd: With a long knife or spatula, cut the curd into 1-inch cubes gently, then stir slowly for 2-3 minutes to help whey release. This encourages uniform texture and tang.
- Drain the Whey: Line a colander with cheesecloth and ladle the curds in. Fold the cloth edges over the curds and place a weight on top to press. Drain for 4 to 6 hours at room temperature or in the fridge for a firmer texture.
- Season and Mold: Once drained,transfer the curds to a bowl. Add salt and mix gently. Press the mixture into a cheese mold lined with cheesecloth to shape. Chill until firm – about 2 hours.
Secrets to Achieving That Irresistibly Creamy Texture
The hallmark of perfect queso fresco is its delicate balance between firmness and melt-in-your-mouth creaminess. To craft creamy queso fresco, temperature control is crucial-warm milk helps the curds develop gently without toughness. Letting the whey drain slowly,without rushing,preserves moisture that grants that meltable softness. Avoid overpressing, which can squeeze out flavor and lead to dryness. Lastly, using whole milk rich in natural fat contributes a luscious mouthfeel that defines your results.
Chef’s Notes and Tips for success
- For tangier notes, experiment with blending lemon juice and vinegar in a 1:1 ratio.
- If you prefer a saltier cheese, salt after draining but prior to molding for even infusion.
- Use non-chlorinated water if diluting calcium chloride to avoid affecting curd formation.
- Make ahead: queso fresco can be stored in an airtight container in the fridge for up to 5 days-flavor intensifies over time.
- Practice patience with draining times; short drains yield creamier but softer cheese, long drains give sliceable texture.
Creative Serving Suggestions to Elevate Your Homemade Queso Fresco
This versatile cheese shines both as a centerpiece and a subtle enhancer:
- Crumble it over warm enchiladas, tacos, or fresh salads to add a creamy tang.
- Slice thick and layer on warm homemade corn tortillas with sliced avocado and a sprinkle of chili powder.
- Pair with fresh fruits like mango or watermelon for a refreshing summer appetizer.
- Top grilled vegetables or roasted chiles with crumbles for contrasting textures.
- Wrap pieces in corn husks with chili and herbs for a swift, delicious queso fresco tamale.
| nutrient | Per 100g |
|---|---|
| Calories | 265 kcal |
| Protein | 18g |
| Carbohydrates | 2g |
| Fat | 20g |


For deeper insight on the chemistry of cheese-making, visit the Cheese Making Resource.
Q&A
Q&A: Crafting Creamy Queso Fresco - your Homemade guide
Q1: What exactly is queso fresco?
A: Queso fresco is a fresh, creamy mexican cheese known for its mild, slightly tangy flavor and crumbly yet smooth texture. Unlike aged cheeses, it’s enjoyed fresh, offering a shining and approachable taste that complements a variety of dishes from tacos to salads.
Q2: Can I really make queso fresco at home?
A: Absolutely! Making queso fresco at home is surprisingly simple and rewarding. with just a few ingredients-milk, an acid like lemon juice or vinegar, and a pinch of salt-you can craft a fresh, creamy cheese right in your kitchen that rivals store-bought versions.
Q3: What kind of milk should I use?
A: Whole milk is your best bet for a rich, creamy queso fresco. Raw or pasteurized milk both work, but avoid ultra-pasteurized as it doesn’t curdle well. If you want a dairy twist, goat’s milk can add a tangy depth.
Q4: How does the acid help make queso fresco?
A: The acid-usually lemon juice or white vinegar-causes the milk to curdle, separating into curds (solid) and whey (liquid). Gently heating the milk before adding acid ensures perfect curd formation, which is the essential base for your queso fresco.
Q5: What’s the trick to getting that creamy texture?
A: Timing and gentle handling are key. Once the curds form, let them rest to firm up slightly, then carefully drain the whey through cheesecloth. Pressing too hard makes it crumbly; a light press keeps it delicate and creamy.
Q6: Can I flavor my queso fresco?
A: Definitely! While customary queso fresco is mild and slightly salty, you can mix in fresh herbs, minced jalapeños, or a pinch of smoked paprika for a personal touch.just add flavors before pressing for an even blend.
Q7: How long will homemade queso fresco last?
A: As it’s fresh and unaged, it’s best enjoyed within 4 to 5 days when kept refrigerated in an airtight container. its fresh tang is at its peak early on,so plan to enjoy it soon after making.
Q8: What dishes shine brightest with queso fresco?
A: Queso fresco is incredibly versatile! Crumble it over spicy enchiladas, melt it slightly into beans, dollop on fresh salads, or simply enjoy it alongside warm tortillas. Its creamy freshness adds balance to bold flavors.
Q9: Is making queso fresco expensive or complicated?
A: Not at all! With just a few everyday ingredients and minimal equipment-like a pot,thermometer,and cheesecloth-it’s an affordable and straightforward project. Plus, the satisfaction of homemade cheese? Priceless.
Q10: Any final tips for queso fresco success?
A: Keep your milk warm but not boiling, add acid gradually, and be patient during draining and pressing. Each batch teaches you something new-embrace the process, and your homemade queso fresco will be deliciously creamy every time!
To Conclude
With a little patience and a few simple ingredients, crafting your own creamy queso fresco transforms from a kitchen project into a rewarding culinary adventure. Beyond its fresh, tangy flavor and smooth texture, homemade queso fresco carries the warmth of tradition and the satisfaction of self-made goodness. So next time you crave that perfect cheese to elevate your dishes, remember: the best queso doesn’t just come from a store-it comes from your own hands. Happy cheesemaking!