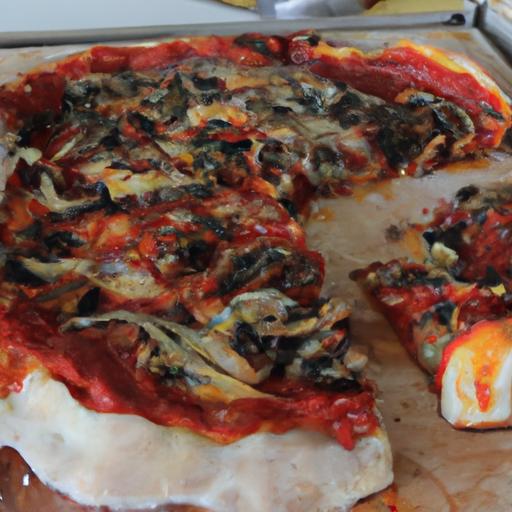
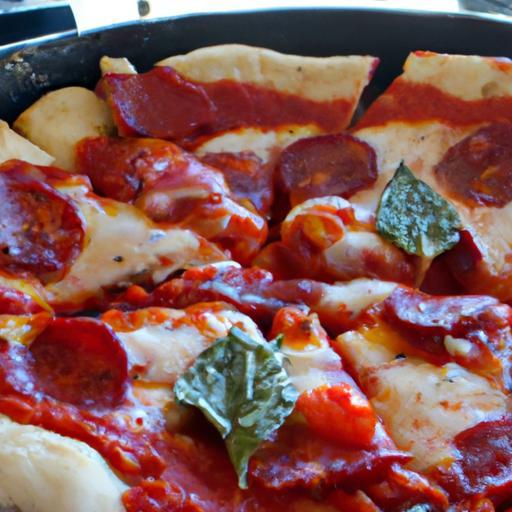
ThereS something undeniably magical about a pizza fresh from the oven-the bubbly, golden crust, the rich aroma of melted cheese, and the vibrant medley of toppings that invite you to take that first, irresistible bite. But for those navigating the world of gluten-free living, finding a crust that captures that same perfect balance of texture and flavor can feel like a culinary quest. Enter the art of crafting the perfect homemade gluten-free pizza crust: a delicate dance of science and creativity that transforms simple ingredients into a crispy, tender foundation worthy of any favorite topping. In this article, we’ll explore the secrets, tips, and techniques to help you master a gluten-free pizza crust that doesn’t just substitute for the original-it stands confidently on its own. Get ready to roll up your sleeves and discover how to bring pizzeria-quality gluten-free pizza into your own kitchen.
Crafting the perfect homemade gluten-free pizza crust starts with understanding the delicate balance between flour selection, dough hydration, and baking technique. Achieving a crust that is tender yet flavorful, with a pleasingly crispy edge and a chewy center, requires thoughtful choices and precision-transforming your kitchen into a pizzeria where every bite delights.
Prep and Cook Time
- Prep Time: 20 minutes
- Rising Time: 1 hour
- Cook Time: 15-20 minutes
Yield
one 12-inch pizza crust (serves 2-3)
difficulty Level
Medium – Perfect for home cooks ready to elevate their gluten-free baking skills
Ingredients
- 1 cup gluten-free all-purpose flour blend (preferably with xanthan gum included)
- ½ cup brown rice flour
- ¼ cup tapioca starch
- 1 teaspoon baking powder (gluten-free)
- 1 teaspoon sugar
- ½ teaspoon fine sea salt
- 1 tablespoon olive oil, plus extra for brushing
- ¾ cup warm water (110°F / 43°C)
- 1 teaspoon active dry yeast
- Optional: 1 teaspoon apple cider vinegar (to boost tenderness)
Instructions
- Activate the yeast: In a small bowl, whisk together warm water, sugar, and yeast. Let it sit for 5-7 minutes until foamy and bubbling-this ensures your dough will rise beautifully.
- Mix dry flours: In a large bowl,combine the gluten-free all-purpose flour,brown rice flour,tapioca starch,baking powder,and salt. Whisk thoroughly to blend all ingredients evenly, which improves crumb texture.
- Combine wet ingredients: add olive oil and apple cider vinegar (if using) to the yeast mixture.
- Form the dough: Gradually pour the wet mixture into the dry flours, stirring with a wooden spoon until a sticky dough forms. The dough should be tacky but hold together. If it feels too dry, add water, one tablespoon at a time.
- Hydrate and knead: Lightly oil your hands and knead the dough gently in the bowl for 2 minutes. This encourages gluten-free flour hydration, vital for pliability and crumb structure.
- First rise: Cover the bowl with a damp towel or plastic wrap and place it in a warm spot for about 1 hour,until the dough slightly puffs up.
- Preheat your oven: Set to 475°F (245°C), and if using a pizza stone, place it in the oven to heat.
- Shape your crust: Transfer dough to a well-oiled sheet of parchment paper and gently press it into a 12-inch round, about ¼-inch thick. For a tender interior with a crispy edge, focus on even thickness and slightly thicker borders.
- par-bake the crust: Slide the parchment onto the preheated stone or baking tray. Bake for 7-8 minutes, until edges start firming and lightly golden; this step prevents sogginess from toppings.
- Add toppings and finish baking: remove crust from oven, add your favorite sauce, cheese, and toppings. Return to oven for 7-12 minutes until the cheese bubbles and the edges crisp up perfectly.
- Cool and serve: let your pizza rest for 5 minutes post-bake to develop flavor and texture before slicing.
Tips for Success in Crafting the Perfect Homemade Gluten-Free Pizza Crust
- Select flours wisely: A blend that balances all-purpose gluten-free flour with brown rice flour and tapioca starch creates both structure and chewiness. Avoid single-flour recipes which can yield dense or crumbly crusts.
- Hydration is key: Gluten-free flours absorb water differently. A sticky, tacky dough is the goal-too dry means a crumbly crust, too wet will result in heaviness.
- Use xanthan gum: If your flour blend lacks it, add ½ teaspoon to mimic gluten’s elasticity, enabling stretch and chew.
- Par-baking is essential: It sets the crust foundation and guards against sogginess from moist toppings.
- Enhance crust flavor: A splash of apple cider vinegar or a teaspoon of sugar in the dough provides subtle complexity and browning.
- Avoid overhandling: Gluten-free doughs don’t require intensive kneading; gentle folding suffices to prevent toughness.
Serving Suggestions
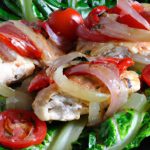
Serve your pizza on a rustic wooden board for a cozy, artisanal feel. Garnish with freshly torn basil leaves and a drizzle of high-quality extra virgin olive oil. Pair with a crisp, lightly chilled white wine or a sparkling citrus soda for balance.consider a side of mixed greens tossed in lemon vinaigrette to complement the savory richness of the pizza.

Nutritional Information (per serving)
| Calories | Protein | Carbohydrates | Fat |
|---|---|---|---|
| 210 | 4g | 40g | 5g |
For more gluten-free baking inspiration, check out our Guide to Gluten-Free Bread. for detailed information on gluten-free flours and their baking properties, visit Celiac Disease Foundation.
Q&A
Q&A: Crafting the Perfect Homemade Gluten-Free Pizza Crust
Q1: Why is making a gluten-free pizza crust at home different from a customary one?
Great question! Traditional pizza dough relies heavily on gluten-a protein that gives dough its elasticity and chewy texture. Without gluten, the dough can be crumbly or dense if not handled correctly. That’s why gluten-free crusts require a careful blend of alternative flours and binders to mimic that perfect pizza texture.

Q2: What are the best flours to use for a gluten-free pizza crust?
A winning gluten-free crust often starts with a blend. Common options include almond flour for richness, tapioca starch for chewiness, rice flour for lightness, and sometimes oat flour for a subtle nutty flavor. Combining these flours intelligently creates a balanced base that’s neither too dry nor too heavy.
Q3: How can I make my gluten-free pizza crust hold together without gluten?
Binders are your best friends here! Ingredients like xanthan gum, psyllium husk, or chia seeds help replicate the stretch and cohesion gluten provides. They trap moisture and create a more elastic dough, which means your crust won’t crumble when you pick up a slice.Q4: Is there a secret trick to getting the crust crispy?
Absolutely! Pre-baking the crust for about 10-12 minutes before adding your toppings gives it a sturdy foundation. Using a pizza stone or baking steel supercharges crispness by evenly distributing heat. And don’t forget a light brush of olive oil on the edges-it browns beautifully and adds a subtle crunch.
Q5: Can I make the dough ahead of time?
Definitely! Gluten-free dough often benefits from resting-either for 30 minutes at room temperature or refrigerated overnight. This rest period allows flours and binders to fully hydrate, resulting in a nicer texture and easier handling when shaping the crust.
Q6: How do I prevent my gluten-free crust from sticking to the pan or pizza peel?
Dust your work surface and peel generously with gluten-free flour or cornmeal. For baking sheets or stones, a sheet of parchment paper is a gluten-free baker’s best friend; it keeps the crust from sticking without interfering with crisping.
Q7: Can I make dairy-free or vegan versions of gluten-free pizza crust?
Of course! Many gluten-free crust recipes rely on eggs as binders, but you can replace them with flax or chia egg substitutes for a vegan option.Plant-based milks and oils can also replace dairy ingredients without losing flavor or texture.
Q8: Any tips for topping choices on a homemade gluten-free crust?
Since gluten-free crusts can be more delicate, less is more when it comes to toppings. Stick to lighter toppings and moderate amounts of sauce to avoid sogginess. Fresh veggies, light cheeses, and a drizzle of olive oil frequently enough do wonders.Q9: How can beginners build confidence when crafting gluten-free pizza from scratch?
Start small-a personal-sized pizza lets you experiment without pressure. Don’t stress about perfection-the journey is tasty! Take notes on what worked and tweak ingredients in your next batch. Soon, you’ll discover your own magic formula for crust perfection.
Q10: Why is homemade gluten-free pizza crust worth the effort?
As it’s a delicious expression of creativity and care! Making your own crust means you control every ingredient, catering to your dietary needs while enjoying the joy of fresh, warm pizza straight from your oven.Plus, nothing beats the aroma of baking dough filling your kitchen. Now, that’s homemade happiness.
The Way Forward
With a little patience and the right blend of ingredients, crafting the perfect homemade gluten-free pizza crust transforms from a daunting challenge into a delightful kitchen adventure. Each bite offers not just a tasty foundation for your favorite toppings, but also the satisfaction of knowing exactly what went into your creation. so whether you’re catering to dietary needs or simply exploring new culinary horizons, this crust is your canvas-ready to be topped, baked, and enjoyed. Embrace the process, experiment boldly, and most importantly, savor every slice of your gluten-free masterpiece.