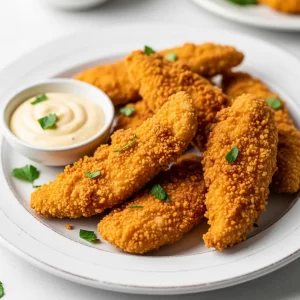
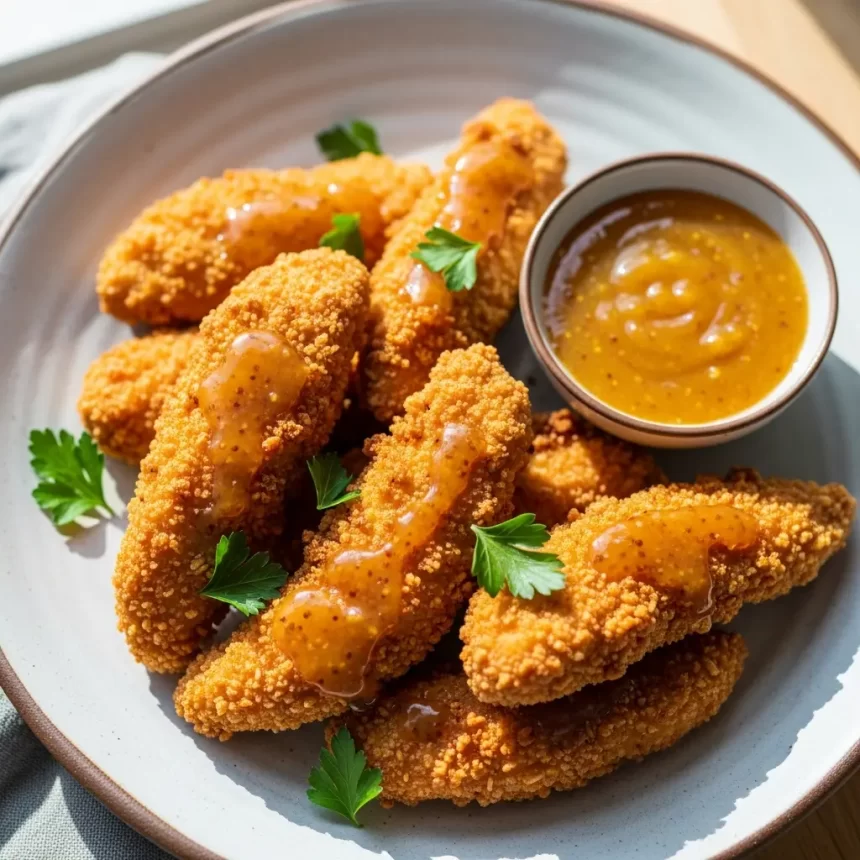
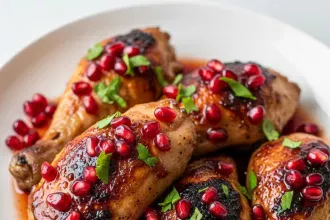
There’s somthing irresistibly satisfying about biting into a perfectly crispy chicken tender-golden, crunchy on the outside, juicy and tender on the inside. Whether you’re craving a quick weeknight dinner or a crowd-pleasing appetizer, homemade chicken tenders are the ultimate comfort food that never goes out of style. Best of all? making them from scratch is easier than you think. In this article, we’ll guide you through a simple, foolproof recipe to create crispy, flavorful chicken tenders right in your own kitchen-no deep fryer required. Get ready to discover how easy it is indeed to elevate this classic favorite into a dish you and your loved ones will absolutely adore!
Crispy & easy Homemade Chicken Tenders You’ll Love! start with selecting the ideal chicken cuts to unlock that irresistible crunch every time you cook. Choosing the right pieces plays a crucial role in achieving juicy, tender interiors while the exterior sizzles to golden perfection.
Prep and Cook Time
- Preparation: 15 minutes
- Marinating (optional): 30 minutes to 2 hours
- Cooking: 12-15 minutes
- Total Time: 27-32 minutes (excluding marinating)
Yield
- Serves 4-6 hungry guests
Difficulty Level
- Easy - Perfect for cooks at any skill level
Choosing the Perfect Cuts & ingredients for Ultimate Crispiness
Start with fresh, skinless chicken tenderloins or trimmed chicken breasts cut into uniform strips about 3-4 inches long for even cooking. Tenderloins are naturally tender,offering that juicy bite beneath a crunchy shell,while breast strips work well when pounded slightly thinner. Both cuts absorb flavors beautifully without drying out.
For the coating, simplicity is key. A classic trio of all-purpose flour,panko breadcrumbs,and seasonings provides the perfect textural contrast. Panko breadcrumbs deliver an airy, crisp crunch distinct from regular crumbs, elevating the homemade experience. Adding spices like smoked paprika, garlic powder, and cayenne awakens the palate.
Mastering the Art of the Crunchy Coating with Simple Ingredients
The secret to that unbeatable crunch lies in a well-layered breading process. Begin by patting the chicken strips dry with paper towels – this step is non-negotiable to help the coating adhere firmly.
- Dredge the chicken first in seasoned all-purpose flour. This light dusting helps the wet batter stick better.
- Dip into beaten eggs with a splash of whole milk or buttermilk for flavor and moisture.
- Press into a seasoned panko breadcrumb mixture enhanced with finely grated Parmesan cheese for an extra depth of savory crunch.
- For ultimate texture, double-dipping (egg then panko, then egg and panko again) offers an ultra-crispy result that stays crunchy even after cooling slightly.
Frying in hot oil (350°F/175°C) ensures rapid cooking and creates that irresistible golden crust you crave. Avoid overcrowding the pan to maintain oil temperature and crispy outsides.
Secret Tips to Achieve Juicy and Tender Chicken Every Time
- marinate chicken strips in buttermilk and a pinch of salt for at least 30 minutes to tenderize and infuse moisture deeply.
- Use a meat thermometer-an internal temp of 165°F (74°C) ensures safe, perfectly cooked chicken without drying out.
- Let cooked tenders rest briefly on a wire rack after frying to prevent sogginess while draining excess oil.
- If baking rather of frying, spray tenders lightly with oil and bake at 425°F (220°C) for 15-20 minutes, flipping halfway.
Serving Suggestions and Dipping Sauces to Elevate Your Chicken Tenders
These stunning chicken tenders shine as a snack, party appetizer, or main dish. Serve with a vibrant side of crunchy celery sticks and carrot batons for color and crunch contrast. garnish the plate with fresh parsley or a lemon wedge to balance richness.
Dipping sauces are your flavor playground! Classic choices like honey mustard and tangy buffalo sauce are crowd-pleasers. For a gourmet twist, whip up creamy garlic aioli, spicy sriracha mayo, or a cooling ranch dip with fresh herbs. A drizzle of homemade barbecue sauce adds smoky sweetness to the crispy bites.

Paired with a crisp green salad or truffle fries, this dish transforms instantly into a memorable meal.
Ingredients
- 1 ½ lbs chicken tenderloins, trimmed and patted dry
- 1 cup all-purpose flour, sifted
- 2 large eggs
- ¼ cup whole milk or buttermilk
- 1 ½ cups panko breadcrumbs
- ½ cup finely grated Parmesan cheese
- 1 teaspoon smoked paprika
- 1 teaspoon garlic powder
- ½ teaspoon cayenne pepper (optional, for heat)
- Salt and freshly ground black pepper, to taste
- Vegetable oil or peanut oil, for frying
Instructions
- Marinate: In a bowl, combine the chicken tenderloins with buttermilk and a pinch of salt.Cover and refrigerate for 30 minutes to 2 hours if time allows to tenderize and add moisture.
- Prepare coatings: In a shallow plate, mix the flour, smoked paprika, garlic powder, salt, and pepper. In a second bowl, whisk the eggs with milk. In a third dish, combine panko breadcrumbs and Parmesan cheese.
- Coat chicken: Remove tenders from marinade,shaking off excess. Dredge each piece in seasoned flour, then dip into egg mixture, and finally press into panko-Parmesan mix.For extra crispiness, dip the coated tender once more into egg, then panko.
- Heat oil: Pour oil to a depth of 1 inch in a heavy skillet and heat over medium-high until it reaches 350°F (175°C). Use a thermometer for accuracy.
- Fry tenders: Carefully add chicken strips in batches without overcrowding. Fry until golden brown and cooked through, about 3-4 minutes per side. Remove with a slotted spoon and drain on a wire rack.
- Serve warm: Let rest 2 minutes for juices to redistribute. Plate with dipping sauces and garnishes.
Tips for Success
- Substitutions: Gluten-free flour and breadcrumbs work well for dietary needs.
- Make ahead: Prep breaded tenders in advance and refrigerate up to 3 hours before frying.
- Oil choice: Use neutral oils with high smoke points like peanut or canola to avoid burning flavors.
- Keep it crispy: Avoid stacking tenders after frying; use a wire rack instead of paper towels for draining.
Nutritional Information
| Per serving | Calories | Protein | Carbs | Fat |
|---|---|---|---|---|
| 3 Chicken Tenders | 320 kcal | 35 g | 15 g | 12 g |
For more inspiration on crispy homemade favorites, check out our Crispy Fried Chicken Recipe. To understand the science behind frying techniques and optimizing crispiness, visit Serious Eats.

Q&A
Q&A: Crispy & Easy Homemade Chicken Tenders You’ll Love!
Q1: What makes homemade chicken tenders better than store-bought or fast-food versions?
A1: Homemade chicken tenders let you control the quality of ingredients, ensuring juicy, tender chicken with a perfectly crispy coating – free from preservatives and excessive oils. Plus, you can customize the seasoning to fit your flavor cravings, making each bite truly your own.
Q2: How do I achieve that irresistible crispy crunch without deep frying?
A2: The secret is in the coating and cooking technique! Start with a seasoned flour mixture, dip the tenders in an egg wash, then coat them with panko breadcrumbs for maximum crunch. Baking or air-frying at a high temperature creates a crisp outer layer without the greasy mess of deep frying.
Q3: what’s a foolproof marinade for juicy chicken tenders?
A3: A quick soak in buttermilk or plain yogurt with a pinch of salt, garlic powder, and paprika works wonders. It tenderizes the meat and infuses flavor. Even 30 minutes makes a difference, but a few hours (or overnight) gives truly tender results.
Q4: Can I make these chicken tenders gluten-free?
A4: Absolutely! Swap regular flour and breadcrumbs for gluten-free alternatives like almond flour and gluten-free panko or crushed cornflakes. The key is to maintain that crispy texture while keeping your tenders safe for gluten-sensitive diners.
Q5: Any creative dipping sauces to pair with these tenders?
A5: You can’t go wrong with classic honey mustard or ranch, but why not get adventurous? Try tangy buffalo sauce, smoky chipotle aioli, or a sweet and spicy mango chutney. Dips elevate your tenders from a snack to a flavor-packed experience.
Q6: How long do homemade chicken tenders take to prepare and cook?
A6: From prep to plate, it’s about 30-40 minutes. Marinating takes the longest if you choose to do it, but the actual assembly and cooking move quickly, making this a perfect weeknight meal that feels indulgent without the effort.
Q7: Can kids safely help make homemade chicken tenders?
A7: Definately! Kids love dipping the chicken and coating it in breadcrumbs - it’s hands-on and fun. Just handle the raw chicken yourself and supervise closely to keep things safe and hygienic.
Q8: What’s the best way to store and reheat leftovers?
A8: Store cooled tenders in an airtight container in the fridge for up to 3 days.To reheat, use an oven or air fryer at 350°F (175°C) for about 5-7 minutes to refresh that crispy crust.Avoid microwaving, which can make them soggy.
Q9: Can this recipe be doubled for a crowd?
A9: Yes! The ingredients scale up easily, and you can bake multiple trays at once, rotating if necessary for even crispiness. Homemade chicken tenders are crowd-pleasers - perfect for parties,movie nights,or family dinners.
ready to roll up your sleeves and create crispy, juicy, homemade chicken tenders that everyone will adore? Dive into the recipe and start cooking!
Closing Remarks
There you have it-a foolproof recipe for crispy, golden chicken tenders that bring all the comfort and crunch you crave, right into your own kitchen.With simple ingredients and straightforward steps, these homemade tenders are perfect for family dinners, game days, or whenever you’re craving that perfect bite. So next time hunger strikes, skip the takeout and savor the satisfying homemade crunch that’s as easy as it is flavorful. Your taste buds-and your loved ones-will thank you!